
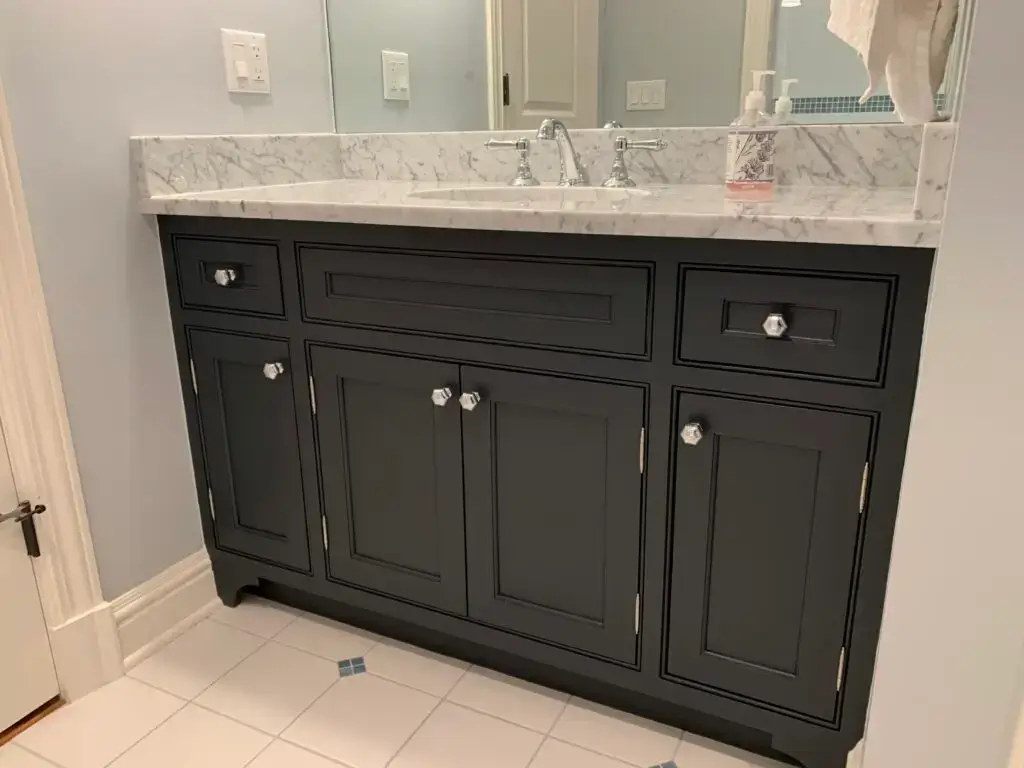
Painting bathroom cabinets is one of the most impactful and cost-effective ways to update the look of your bathroom without the expense of a full renovation. A fresh coat of paint can instantly transform a dated space, making it feel brighter, cleaner, and more modern. However, bathroom cabinets face unique challenges – humidity, moisture, and frequent use – which means a successful paint job requires meticulous preparation and the right materials. Anderson’s Painting provides a comprehensive, step-by-step guide to painting bathroom cabinets, ensuring a durable, smooth, and professional-looking finish that stands the test of time.
Tools and supplies you’ll need
Gathering all your materials beforehand will ensure a smooth and efficient painting process.
- Safety Gear:
- Rubber gloves
- Safety glasses
- N95 respirator mask (especially when sanding or using oil-based paints)
- Disassembly & Protection:
- Screwdriver (manual or power drill)
- Plastic bags or containers (for hardware)
- Painter’s tape (high-quality, low-tack)
- Drop cloths or old sheets
- Work surface protection (cardboard, old towels)
- Cleaning:
- Degreaser cleaner (e.g., TSP substitute, Krud Kutter, or strong dish soap)
- Clean sponges and cloths
- Bucket of warm water
- Sanding & Preparation:
- Sanding blocks or orbital sander
- Sandpaper (120-grit for initial sanding, 220-grit for smoothing primer/first coat)
- Tack cloth or microfiber cloths (for dust removal)
- Priming & Painting:
- High-quality paint primer (bonding or stain-blocking, depending on cabinet material/condition)
- Paint specifically formulated for cabinets or high-humidity areas (see “Choosing the Right Paint” below)
- Paint tray
- High-quality synthetic bristle brush (e.g., angled sash brush for cutting in and detailed areas)
- Small foam roller or fine-finish mohair roller (for smooth surfaces)
- Roller covers (appropriate nap for your roller type)
- Paint stirrer
- Optional:
- Wood filler or spackle (for imperfections)
- Caulk gun and paintable caulk (for filling gaps if needed)
- Small blocks or painter’s pyramids (to elevate doors/drawers for drying)
Surface prep: Clean, sand, and prime
Proper preparation is the most critical step for a professional and durable paint job. Do not skip or rush this stage!
- Empty and Disassemble:
- Remove everything from inside and on top of the cabinets.
- Carefully remove all doors and drawer fronts. Label each piece (e.g., “U1-L” for Upper Cabinet 1, Left Door) and its corresponding hinges and hardware. Place hardware in labeled plastic bags to avoid losing pieces.
- Remove all pulls, knobs, and hinges from the doors and drawer fronts.
- Clean Thoroughly:
- Bathroom cabinets accumulate soap scum, hairspray residue, oils, and general grime. Use a strong degreaser cleaner (TSP substitute, Krud Kutter, or a mixture of warm water and strong dish soap).
- Scrub all surfaces – doors, drawer fronts, and the cabinet frames – until they are completely free of grease and dirt.
- Rinse thoroughly with clean water and a clean cloth to remove all cleaning solution residue. Allow to dry completely.
- Repair Imperfections (If Needed):
- Fill any small holes, dents, or gouges with wood filler or spackle. Allow to dry completely.
- Sand the repaired areas smooth with 220-grit sandpaper.
- Sand All Surfaces:
- Purpose: Sanding creates a “tooth” for the primer and paint to adhere to, which is crucial for durability, especially with shiny existing finishes.
- Grit: Start with 120-grit sandpaper for initial sanding, especially if cabinets have a thick, glossy finish or peeling paint. For lighter scuff sanding or between coats, use 220-grit.
- Method: Sand all surfaces – doors, drawer fronts (front and back), and the cabinet frames. Sand with the grain of the wood (if applicable). Don’t try to remove all the old finish; just dull it.
- Feather Edges: If there are areas of peeling paint, sand the edges to create a smooth transition.
- Remove Dust:
- After sanding, thoroughly wipe down all surfaces with a tack cloth or a damp microfiber cloth to remove all sanding dust. Dust is the enemy of a smooth finish!
- Allow the surfaces to dry completely after wiping.
- Prime:
- Why Prime? Primer provides a uniform base, promotes adhesion, blocks stains (especially if you have water stains or are going from dark to light), and ensures even paint absorption.
- Type of Primer: For bathroom cabinets, a high-quality bonding primer (like Zinsser B-I-N Shellac-Based Primer or Kilz Adhesion) is often recommended, especially over tricky surfaces like laminate, thermofoil, or previously glossy finishes. A stain-blocking primer is essential if you have water stains or are painting over dark wood that might bleed through.
- Application: Apply a thin, even coat of primer to all surfaces using a brush for corners and details, and a foam roller for flat areas.
- Drying & Light Sanding: Allow the primer to dry completely according to manufacturer instructions. Once dry, lightly sand with 220-grit sandpaper to smooth out any brush strokes or imperfections. Remove dust with a tack cloth. A second coat of primer might be beneficial for very dark or problematic surfaces.
Choosing the right paint and finish
The right paint choice is crucial for a durable, moisture-resistant finish in a bathroom.
- Paint Type:
- Acrylic-Latex Enamel: This is generally the best choice for bathroom cabinets. Look for high-quality, 100% acrylic latex or acrylic-urethane enamel. These paints offer excellent durability, flexibility, and resistance to moisture and chipping. They are also water-based, making cleanup easier.
- Urethane Alkyd Enamel (Water-Based Hybrid): These paints offer the hardness and durability of traditional oil-based paints with the easy cleanup of water-based formulas. They cure to a very hard, smooth finish, ideal for cabinets. (e.g., Sherwin-Williams Emerald Urethane Trim Enamel).
- Avoid standard oil-based paints: While durable, they yellow over time, have strong odors, and are harder to clean up.
- Finish (Sheen):
- Satin or Semi-Gloss: These are the best choices for bathroom cabinets.
- Satin: Offers a subtle sheen, good durability, and is easy to clean. It hides minor imperfections better than semi-gloss.
- Semi-Gloss: Provides a noticeable shine, maximum durability, and is the easiest to clean. It’s highly resistant to moisture and scrubbing. However, it will highlight any surface imperfections more readily.
- Avoid Flat or Eggshell: These finishes are too porous for bathroom humidity and will be difficult to clean and maintain.
- Satin or Semi-Gloss: These are the best choices for bathroom cabinets.
Check it out: Best Paint for Wood Furniture: Complete Guide
Painting techniques for a smooth finish
Achieving a smooth, professional-looking finish requires patience and proper technique.
- Work in a Clean, Dust-Free Area: Set up a painting station in a well-ventilated area away from dust and drafts. Elevate doors and drawers on painter’s pyramids or blocks to allow edges to be painted and dried properly.
- Start with Insets and Edges:
- Use your high-quality angled brush to paint any recessed panels, detailed moldings, and the edges of doors/drawer fronts first.
- Paint the interior edges of the cabinet frames that will be visible when the doors are closed.
- Paint Flat Surfaces with a Roller:
- For the large, flat areas of doors, drawer fronts, and cabinet frames, use a small foam roller or fine-finish mohair roller. These rollers lay down paint very smoothly, minimizing texture.
- Roll in long, even strokes, maintaining a “wet edge” to avoid lap marks. Don’t press too hard, as this can create bubbles.
- Avoid Overworking the Paint: Apply paint evenly and then leave it alone. Excessive brushing or rolling can lead to brush marks, roller marks, or a less smooth finish.
- Apply Thin Coats: It’s always better to apply two or three thin, even coats of paint than one thick coat. Thin coats dry faster, reduce drips, and create a more durable, smoother finish.
- Paint the Backs First (for doors): If painting both sides of doors, paint the back first. Once dry to the touch, flip them over to paint the fronts. This ensures any imperfections are on the less visible side.
Drying, curing, and reassembling
Patience is key during the drying and curing phases for long-term durability.
- Drying Between Coats:
- Allow each coat of paint (and primer) to dry completely according to the manufacturer’s instructions. This usually ranges from 2-4 hours for water-based paints.
- Lightly sand with 220-grit sandpaper between coats, especially if there are any bumps or imperfections. Remove dust with a tack cloth before applying the next coat.
- Full Drying Time (Before Handling/Reassembly):
- Even if the paint feels dry to the touch, it needs more time to fully harden. Wait at least 24-48 hours (or longer, per manufacturer recommendations) after the final coat before handling painted pieces for reassembly. This prevents nicks, scratches, or fingerprints.
- Curing Time (Before Heavy Use):
- Paint “cures” over a longer period, sometimes up to 3-4 weeks for full hardness. During this time, the paint is still hardening.
- Be Gentle: Avoid heavy scrubbing or placing wet items directly on the painted surfaces during the curing period. Use care when re-attaching hardware.
- Reassemble Carefully:
- Once fully dry, re-attach all hinges, pulls, and knobs using your labeled bags.
- Re-hang the doors and re-insert the drawers into the cabinet frames.
- Adjust hinges if necessary for proper alignment.
By following these detailed steps, you can achieve a professional, durable, and beautiful paint finish on your bathroom cabinets that will stand up to the demands of daily use and humidity, transforming your bathroom into a refreshed oasis.
Check it out: How to paint kitchen cabinets? DIY guide
Ready to give your bathroom a stunning makeover without the high cost of replacement? Anderson’s Painting specializes in expert cabinet painting, transforming your bathroom cabinets with a flawless, durable finish that stands up to moisture and daily wear. Let us bring your vision to life with precision and quality craftsmanship. Contact us today for a free consultation and estimate!