
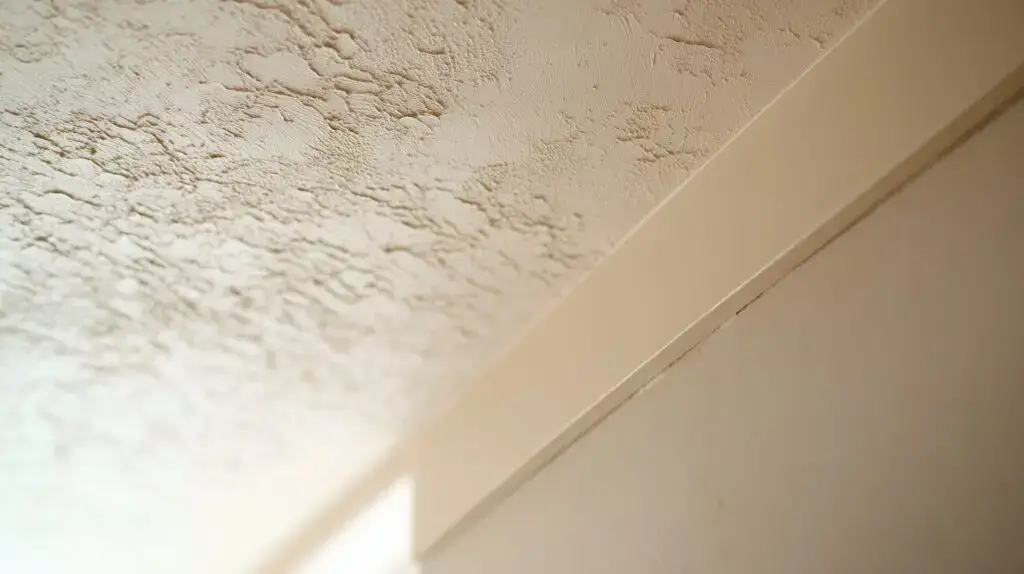
Popcorn ceilings, while once a popular choice, can often collect dust, look dingy, or simply appear outdated. Painting them is an effective way to refresh a room’s appearance, encapsulate minor imperfections, and potentially make future cleaning easier. However, painting a textured popcorn ceiling requires a specific approach to avoid dislodging the delicate texture, creating a mess, or ending up with a flaking finish. Learning how to paint a popcorn ceiling correctly is crucial for achieving a smooth, durable, and clean result.
Tools you’ll need (Roller vs. Sprayer)
The right tools are essential for a successful popcorn ceiling paint job, especially when choosing between rolling and spraying.
- Safety Gear:
- Safety Glasses/Goggles: Essential to protect eyes from falling paint drips and dust.
- Dust Mask/Respirator (N95 or higher): Critical, especially if the ceiling is old (due to potential asbestos – see safety section) or very dusty.
- Head Covering/Old Hat: To protect your hair.
- Gloves: To protect hands from paint.
- Preparation Tools:
- Drop Cloths/Plastic Sheeting: Lots of them! Cover everything in the room – floor, furniture, walls, light fixtures.
- Painter’s Tape: High-quality tape for masking walls and trim.
- Ladder or Scaffolding: A stable platform is crucial for safe and comfortable work.
- Soft-bristled brush or vacuum with soft brush attachment: For initial dust removal.
- Painting Tools:
- Roller:
- Heavy-duty roller frame: A sturdy frame is important for thick paint.
- High-nap roller cover (3/4″ to 1 1/4″ nap): This is essential for getting paint into all the crevices of the popcorn texture. The rougher the texture, the longer the nap needed.
- Extension pole: To reach the ceiling without excessive stretching.
- Paint Sprayer:
- Airless paint sprayer: While more expensive to rent or buy, a sprayer offers the smoothest, fastest, and most uniform finish on popcorn ceilings, with less risk of dislodging texture.
- Cons: Requires significant masking and clean-up. There’s a learning curve to get an even application.
- Paint Tray & Liners: For roller application.
- Cut-in Brush (2-3 inch angled sash brush): For edges and corners where the roller can’t reach.
- Paint Stir Stick.
- Roller:
Prepping the ceiling without damaging texture
Proper prep work is crucial for adhesion and preventing future flaking, but it must be done gently.
- Clear the Room: Remove all furniture, decor, and wall hangings from the room. If large items cannot be removed, move them to the center of the room and cover them completely with plastic sheeting.
- Cover Everything: Lay down drop cloths or plastic sheeting to cover the entire floor. Tape the plastic sheeting up the walls by at least a foot to protect them from drips. Cover light fixtures thoroughly.
- Test for Asbestos (Crucial for Older Ceilings): If your popcorn ceiling was installed before the early 1980s (some sources say 1978, others 1980-1981), it may contain asbestos. Do NOT disturb, scrape, or sand it until it has been professionally tested for asbestos. If asbestos is present, it’s safer to encapsulate it with paint or hire a certified abatement contractor for removal.
- Gentle Cleaning/Dusting:
- The most delicate step. Use a soft-bristled brush attached to a vacuum cleaner (on low suction) to gently vacuum away loose dust and cobwebs. Hold the brush just above the surface, not pressing down.
- Alternatively, a clean, dry, fluffy microfiber duster on an extension pole can be used very gently, but be aware it might dislodge some particles.
- DO NOT use water or damp cloths on unpainted popcorn ceilings, as this will cause the texture to soften and disintegrate.
- Repair Minor Damage:
- For small cracks or holes, use a lightweight spackle or joint compound. Apply it very gently with a putty knife, trying to blend it into the existing texture as much as possible. Do not over-smooth. Let it dry completely.
- Prime the Ceiling (Crucial):
- Use a high-quality, oil-based or PVA (polyvinyl acetate) primer. This is critical, especially for unpainted popcorn ceilings, as it seals the porous surface, prevents moisture from the paint from soaking in and softening the texture, and provides a good base for the topcoat.
- Apply the primer gently with a high-nap roller or a sprayer. Avoid over-saturating the ceiling.
- Allow the primer to dry completely according to manufacturer instructions.
Best paint types for popcorn surfaces
Choosing the right paint ensures both durability and a good finish.
- Flat Latex Ceiling Paint:
- Recommendation: This is generally the best choice for popcorn ceilings.
- Pros: Flat finishes hide imperfections well (which is common for textured ceilings). Latex paint is flexible and easy to clean up. Formulated specifically for ceilings, it often has good opacity.
- Cons: Less durable than higher sheens, but durability is less critical for a ceiling.
- High-Quality Interior Latex Paint (Flat or Eggshell):
- Recommendation: If a dedicated ceiling paint isn’t available, a good quality interior latex paint in a flat or eggshell finish can work.
- Pros: Good coverage and durability. Eggshell offers a slight sheen that can be easier to clean than flat.
- Avoid:
- Glossy or Semi-Gloss Paints: These finishes will highlight every imperfection and unevenness in the texture.
- Oil-Based Paints (for topcoat): While some oil-based primers are good, oil-based topcoats can yellow over time and are less flexible, which can lead to cracking on textured surfaces.
Techniques to minimize drips and texture loss
The method of application is paramount to avoid a messy outcome and preserve the ceiling’s texture.
- Apply Primer First (Always!): As mentioned, primer is your best friend. It “hardens” the texture, making it less likely to flake when you apply the topcoat.
- Use the Right Roller Nap: A 3/4″ to 1 1/4″ nap roller cover is non-negotiable for rolling. It gets paint into all the nooks and crannies with minimal pressure.
- Load the Roller Heavily, but Don’t Drip: You need enough paint on the roller to penetrate the texture, but not so much that it’s dripping excessively. Roll the roller thoroughly in the paint tray.
- Gentle, Even Pressure: When rolling, use steady, light pressure. Too much pressure will crush the texture and cause flakes to fall. Let the long nap of the roller do the work.
- Work in Small Sections: Paint in small, manageable sections (e.g., 4 ft×4 ft), overlapping slightly into the previously painted area to maintain a “wet edge.” This helps prevent roller marks and uneven coverage.
- Two Thin Coats are Better Than One Thick Coat: Resist the urge to apply one thick coat. This leads to drips, sags, and potential texture damage. Two thin, even coats will provide better coverage and a more durable finish.
- Allow Adequate Drying Time Between Coats: Follow the paint manufacturer’s recommended drying time between coats (typically 2-4 hours). Applying a second coat too soon can reactivate the first coat, causing it to tear or clump the texture.
- Use a Paint Sprayer for Best Results (If Skilled): If you’re comfortable with a paint sprayer, this is often the ideal method. It applies an even coat of paint without touching the texture, minimizing flakes and providing a smooth, uniform finish. However, it requires extensive masking of the entire room.
- Cut in Carefully: Use your angled sash brush for edges. Apply paint gently and slowly to avoid getting paint on the walls or creating messy lines.
Safety tips for dust and debris
Working overhead generates dust and debris. Protect yourself and your home.
- Prioritize Asbestos Testing: This cannot be stressed enough. If your home was built before 1980 (roughly), assume asbestos until proven otherwise. Do not proceed with any work that disturbs the texture until testing is done. If asbestos is confirmed, consult a professional.
- Ventilate the Room: Open windows and doors to ensure good airflow. If using oil-based primer or spray paint, turn on any exhaust fans.
- Wear Personal Protective Equipment (PPE):
- Safety Glasses/Goggles: Always wear them to prevent paint drips or dislodged texture from falling into your eyes.
- Dust Mask/Respirator: An N95 mask is a minimum for general dust. If you suspect asbestos or are spray painting, use a higher-rated respirator.
- Full Body Coverage: Wear long sleeves, long pants, and a head covering to protect your skin and hair from paint and dust.
- Cover Everything Extensively: Your entire room should be a giant plastic cocoon. Dust and paint drips will get everywhere if not properly protected.
- Stable Ladder: Always use a sturdy, stable ladder or scaffolding. Have someone spot you if working at significant heights. Never overreach; move the ladder frequently.
- Clean Up Safely: Once painting is complete, carefully roll up drop cloths from the outside in to contain dust and drips. Dispose of paint-soaked materials properly. Vacuum the entire area thoroughly.
By taking the time for thorough preparation, selecting the right tools and paint, and applying careful techniques, you can successfully paint your popcorn ceiling, transforming your space into a cleaner, brighter, and more updated environment.
Check it out: How to paint a bathroom ceiling like a pro?
Feeling overwhelmed by the thought of painting your popcorn ceiling? Anderson’s Painting specializes in expert interior painting, including meticulous preparation and flawless application for challenging surfaces like popcorn ceilings. Our experienced team ensures a smooth, mess-free finish that revitalizes your home. Contact us today for a free consultation and let us handle the high-up work!