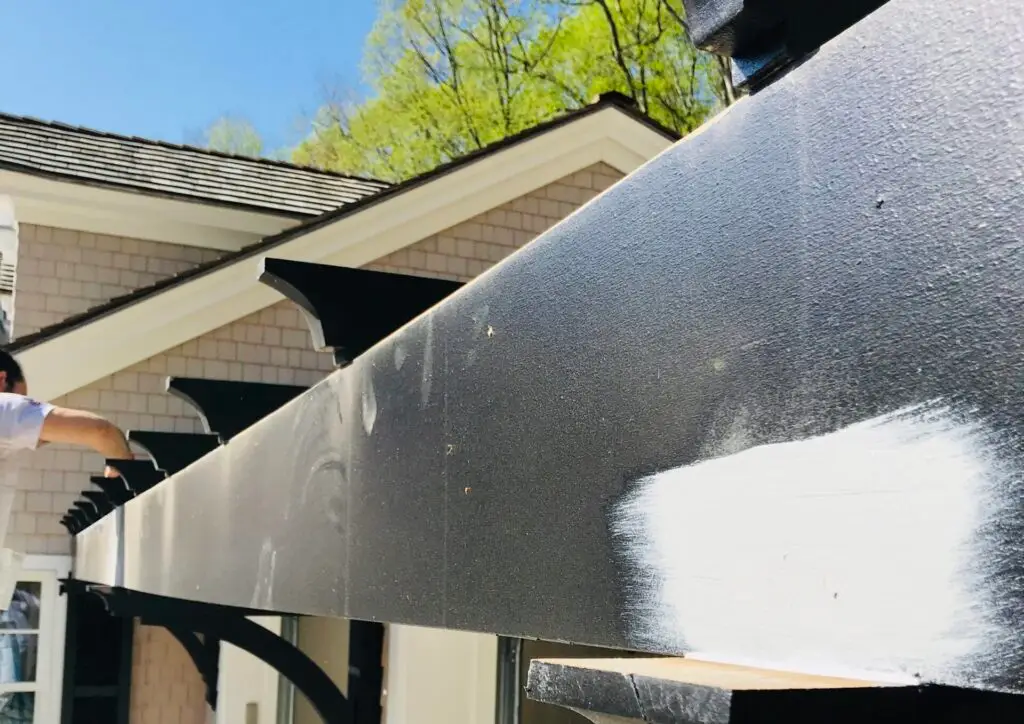
The fascia board—the long, straight board that runs horizontally along the lower edge of the roof—is one of the most visible yet vulnerable elements of your home’s exterior. It acts as the final barrier between your rafters, the elements, and your gutters. Because of its direct exposure to rain, snow, and sunlight, the fascia is often the first part of your home to show signs of paint failure and wear.
Repainting fascia isn’t just about aesthetics; it’s a structural necessity. To ensure the paint job lasts and the wood underneath remains protected, meticulous preparation is non-negotiable. Here is the professional guide to prepping your fascia boards for a flawless repaint.
Why Fascia Board Preparation Is Crucial
The fascia’s location beneath the gutter system makes it prone to moisture damage, demanding extra care during preparation.
Preventing Rot and Paint Failure
The primary job of paint on fascia is to seal the wood against moisture. When the existing paint cracks, flakes, or peels, it exposes the bare wood to rain and humidity, creating an entry point for water.
- Rot: If water repeatedly soaks into exposed wood, it quickly leads to soft spots, decay, and rot.
- Adhesion Failure: New paint applied directly over peeling or rotting wood will fail immediately, usually flaking off within a year or less. Proper scraping and sanding ensure the new paint has a sound, smooth surface to bond with.
Protecting Edges from Moisture
The seams where the fascia meets the house trim or the gutter brackets are critical moisture zones.
- Caulking: The preparation phase must include reapplying high-quality exterior caulk to all gaps and seams. This is what truly weather-seals the wood, preventing water from seeping into the end grains and behind the board, which is a major cause of failure.
Step-by-Step Preparation Guide
A successful fascia repaint is all about thorough, incremental steps. Never rush the preparation.
Scrape and Sand Old Paint
- Scraping: Use a sharp paint scraper or a putty knife to remove all loose, peeling, or bubbling paint. Focus on the edges and areas where the paint has separated from the wood.
- Sanding: Once the loose paint is removed, lightly sand the entire surface. This feathers the edges between the bare wood and the intact old paint, ensuring a smooth transition. Use a medium-grit sandpaper (around 80-100 grit) to create a clean, dull finish that the primer can adhere to.
- Clean: After sanding, wipe the fascia down with a damp cloth or a quick, low-pressure rinse to remove all sanding dust and debris.
Fill Cracks with Wood Filler
Inspect the fascia for any minor cracks, nail holes, or small damaged areas.
- Use a high-quality, exterior-grade wood filler or patching compound. Apply the filler with a putty knife, pushing it firmly into the damaged areas.
- Once the filler is completely dry (check the manufacturer’s drying time, usually several hours), sand the patched areas flush and smooth with the rest of the fascia board.
Apply Mildew Remover If Needed
Fascia boards, especially those on the north side or under heavy tree cover, often develop mildew (a black or gray film).
- If mildew is present, use a solution of water and bleach (or a specialized exterior mildew cleaner) and scrub the affected area with a soft brush.
- Rinse thoroughly with clean water and allow the fascia to dry completely before proceeding to priming. Painting over mildew or damp wood is a guaranteed recipe for immediate paint failure.
Prime with Exterior-Grade Sealer
Priming is not optional when painting bare or patched wood.
- Apply one full coat of a high-quality, exterior-grade, oil-based or acrylic primer to all areas where bare wood is exposed, as well as over wood filler patches.
- The primer acts as a bonding agent, sealant, and stain blocker, preventing tannin bleed from the wood and ensuring maximum adhesion for the topcoat.
Tools & Materials You’ll Need
Professional results require professional tools and a focus on safety.
Scraper, Sander, Primer, Caulk Gun
| Tool/Material | Purpose |
| Ergonomic Paint Scraper | Removing flaking and peeling paint. |
| 80-120 Grit Sandpaper/Sander | Smoothing feathered edges and roughening the surface. |
| Exterior Wood Filler | Patching small holes and imperfections. |
| Exterior Elastomeric Caulk | Sealing joints, seams, and gaps against moisture. |
| Oil-Based or Acrylic Primer | Sealing bare wood and ensuring topcoat adhesion. |
| Caulk Gun | Accurate and consistent application of caulk. |
| Microfiber Cloths | Wiping away dust and cleaning surfaces. |
Ladder Safety Tips for Upper Fascia Areas
Working on fascia boards requires working at height, often near the roofline. Safety is paramount:
- Stable Base: Always place your ladder on a firm, level surface. Never lean a ladder against the gutter itself; always lean it against the fascia or the house structure.
- Three Points of Contact: Maintain three points of contact (two feet and one hand, or two hands and one foot) at all times when climbing or descending.
- Extension: Do not work past the width of your shoulders. Get down, move the ladder, and climb back up. Never overreach, as the fascia is usually at a height that makes falls extremely dangerous.
When to Replace Instead of Repaint
Sometimes, the damage is too extensive for paint to fix. It is always cheaper and safer to replace a small section of rot than to apply expensive paint over a failed substrate.
Signs of Rot or Water Infiltration
Inspect the fascia for the following signs that indicate replacement is necessary:
- Soft Spots: Press on the fascia with your thumb or a screwdriver. If the wood feels spongy or easily yields, rot is present, and the board needs replacing.
- Excessive Cracks: Large, deep cracks (often called “checks”) that run the entire length of the board cannot be properly sealed by caulk and paint alone.
- Peeling/Flaking in Large Sheets: If the existing paint is coming off in huge sheets due to chronic water exposure, it suggests a major moisture issue, possibly from a faulty gutter or roofing edge that must be addressed before any paint is applied.
Matching New Fascia with Existing Paint
If only a section of the fascia needs replacing, ensure the new wood (or PVC/composite material) is installed, fully primed, and ready for paint. A professional can easily match the paint color and sheen of the existing structure, ensuring a seamless, durable finish.
FAQs
Do fascia boards need two coats of paint?
Yes, absolutely. For exterior surfaces, two coats of the topcoat paint are mandatory after priming. The first coat provides excellent coverage, but the second coat is necessary to build the paint film thickness required for maximum UV resistance, color durability, and moisture protection.
Can I paint fascia without priming?
No, never when painting wood. While you can skip primer if you are simply applying a new topcoat over an existing, perfectly intact paint job, you must prime any area where you have scraped down to bare wood or used wood filler. Priming ensures adhesion, prevents wood tannins from staining the topcoat, and seals the wood effectively.
Properly prepared fascia boards can protect your home for decades. But tackling high-up trim work requires expertise, the right safety equipment, and a meticulous approach to preparation that goes beyond simply covering the old color.
Ensure your fascia boards are structurally sound and perfectly prepped for their next coat. Contact Anderson’s Painting today for a professional inspection and a lasting exterior paint solution!