Ceilings are often the unsung heroes of a room, providing a clean, expansive backdrop that influences the overall feel and brightness of a space. Over time, however, ceilings can accumulate dust, develop unsightly stains, or simply start to look dull, dimming the entire room’s ambiance. Repainting your ceiling is a powerful way to refresh a space, cover imperfections, and make a room feel brighter and more inviting. Learning how to repaint a ceiling effectively ensures a smooth, flawless finish that elevates your home’s interior.
When to repaint your ceiling
Knowing the right time to give your ceiling a fresh coat of paint can prevent minor issues from becoming bigger projects and enhance your home’s aesthetic.
- Visible Stains: This is perhaps the most common reason. Water stains (from leaks), smoke stains, grease splatters (kitchens), or even pet-related marks are clear indicators that a repaint is due. Crucially, always address the source of the stain (e.g., fix the leak) before painting.
- Discoloration or Yellowing: Over years, exposure to light, dust, cooking fumes, or smoke can cause ceilings to yellow or dull. This often isn’t noticeable until you paint a test swatch of fresh white.
- Dust and Grime Buildup: Ceilings can collect a surprising amount of dust, cobwebs, and airborne grime, especially in high-traffic areas or homes with forced air heating/cooling. This can make the room feel dingy.
- Cracks or Minor Damage: Small hairline cracks, minor peeling, or surface imperfections can be repaired and then seamlessly covered with paint, restoring a smooth look.
- Updating Room Decor: When you repaint walls or redecorate a room, painting the ceiling a fresh white or a complementary color completes the updated look, ensuring a cohesive design.
- Preparing for Sale: A clean, bright ceiling significantly improves a home’s overall appeal to potential buyers.
Tools and paints you’ll need
Having the right equipment makes the job easier, safer, and more effective.
- Safety Gear:
- Safety Glasses/Goggles: To protect your eyes from paint drips and dust.
- Dust Mask/Respirator: Especially important during cleaning and sanding.
- Head Covering/Old Hat: To protect your hair.
- Preparation Tools:
- Drop Cloths/Plastic Sheeting: Essential to cover floors, furniture, and light fixtures.
- Painter’s Tape: High-quality tape for masking walls and trim.
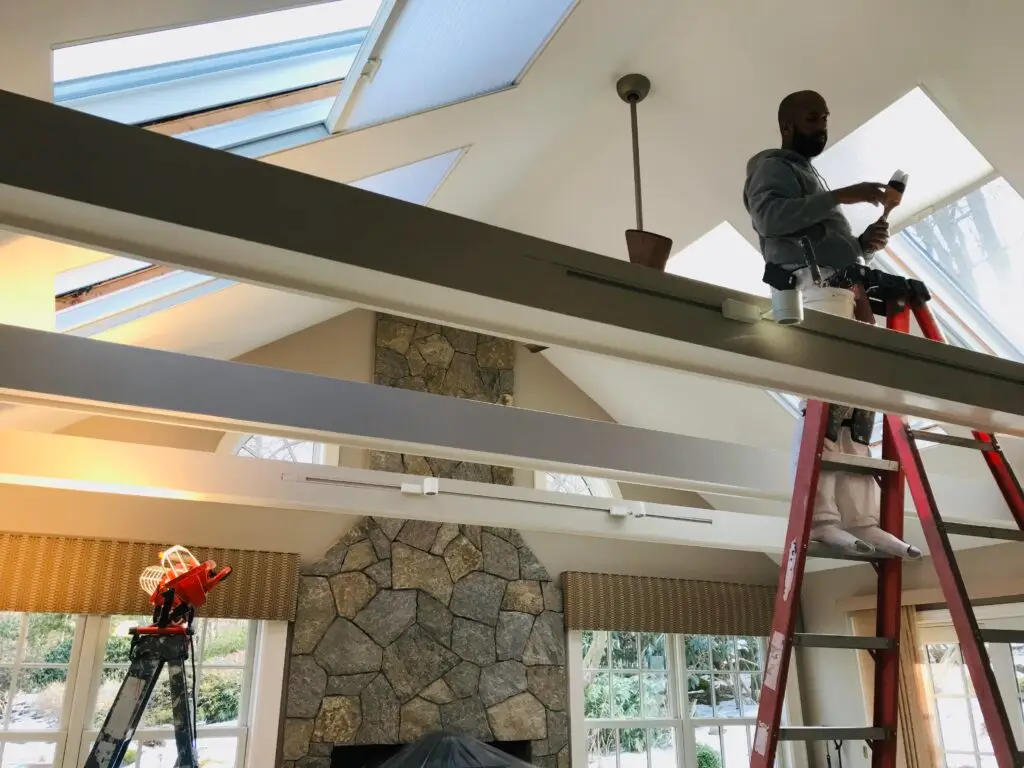
- Step Ladder or Extension Ladder/Scaffolding: A stable platform is crucial for safe and comfortable work. Avoid overstretching.
- Sponge/Cleaning Cloths and Buckets: For cleaning the ceiling.
- Spackle/Joint Compound and Putty Knife: For repairing cracks and holes.
- Sandpaper (fine-grit, 180-220) and Sanding Block/Pole Sander: For smoothing repairs.
- Vacuum with soft brush attachment: For dust removal.
- Painting Tools:
- Paint Tray and Liners: For holding paint and loading rollers.
- Roller Frame: A sturdy, comfortable frame.
- Extension Pole: Allows you to reach the ceiling comfortably while standing on the floor or a lower ladder rung.
- Roller Covers (thick nap): Use a 3/8″ to 1/2″ nap for smooth ceilings, or a 3/4″ to 1 1/4″ nap for textured ceilings (like popcorn, if you choose to paint it). A longer nap holds more paint, reducing trips to the tray and speeding up the process.
- Angled Sash Brush (2-3 inches): For “cutting in” around the edges, corners, and fixtures.
- Paint Stir Stick.
- Paints and Primers:
- Stain-Blocking Primer: Absolutely essential for covering any existing water, smoke, or grease stains. Choose an oil-based (shellac-based is excellent for tough stains) or a high-quality water-based stain-blocking primer.
- Ceiling Paint (Flat Finish): The best choice for ceilings. Flat paint hides imperfections, creates a soft, uniform look, and provides maximum light diffusion without glare.
- High-Quality Interior Latex Paint (Flat or Eggshell): If a dedicated ceiling paint isn’t available, a good interior latex paint in a flat or eggshell finish can work.
Prepping the ceiling (dust, stains, cracks)
Proper preparation is the most critical step for a professional-looking and long-lasting ceiling paint job.
- Clear the Room: Remove all furniture, wall hangings, and decor. If large items cannot be removed, move them to the center of the room and cover them completely with plastic sheeting.
- Protect the Room: Lay down drop cloths or plastic sheeting to cover the entire floor. Tape the plastic sheeting up the walls by at least a foot using painter’s tape to protect them from drips. Cover light fixtures thoroughly.
- Clean the Ceiling:
- Dust Removal: Use a vacuum with a soft brush attachment or a clean, dry microfiber duster on an extension pole to remove all loose dust, cobwebs, and light grime.
- Washing: For kitchens or areas with grease/smoke, lightly wash the ceiling with a sponge dampened with a mild detergent solution. Avoid over-wetting. Rinse with a clean, damp sponge. Allow the ceiling to dry completely (several hours).
- Important Note for Popcorn Ceilings: If you have an unpainted popcorn ceiling, do not wet it, as the texture will disintegrate. For these, use only dry dusting methods. If you suspect asbestos (common in ceilings installed before the early 1980s), do not disturb or sand until professionally tested. Encapsulating with paint is often the safest option if asbestos is present.
- Repair Cracks and Holes:
- Use a putty knife to apply spackle or joint compound to hairline cracks or small holes. For wider cracks, you might need to use joint tape first.
- Allow the repair to dry fully according to product instructions.
- Lightly sand the dried repair smooth with fine-grit sandpaper (180-220) or a pole sander.
- Wipe away all sanding dust with a damp cloth or vacuum.
- Prime Stains (Crucial Step for Stains):
- For any water stains, smoke damage, or grease stains, you must apply a dedicated stain-blocking primer. Do not skip this step or the stain will bleed through your new paint.
- Apply the primer specifically to the stained areas. Allow it to dry completely. For very stubborn stains, a second coat of primer may be necessary.
Painting techniques to avoid drips and marks
Ceiling painting can be challenging due to gravity, but these techniques help achieve a smooth, drip-free finish.
- Cut In First:
- Using your angled sash brush, carefully paint a strip (2-3 inches wide) around the perimeter of the ceiling where it meets the walls.
- Also, cut in around any light fixtures or vents.
- Take your time and use painter’s tape on the walls for a crisp line if needed.
- Load the Roller Properly:
- Pour paint into a roller tray. Load the roller cover by rolling it back and forth in the paint, then on the ribbed section of the tray to remove excess. The roller should be saturated but not dripping.
- Work in Sections:
- Divide the ceiling visually into manageable sections (e.g., 4×4 feet or 5×5 feet).
- Work one section at a time to maintain a “wet edge.” This prevents visible lap marks where wet paint meets dry paint.
- Painting Technique (W or M Pattern):
- Start by rolling an initial “W” or “M” shape within your section.
- Without lifting the roller, fill in the “W” or “M” pattern with parallel strokes, overlapping each stroke slightly.
- Finish the section with a final, light roll in one consistent direction (e.g., parallel to the main light source or the longest wall) to ensure a uniform texture.
- Maintain a Wet Edge: As you move to the next section, always slightly overlap your new strokes into the wet paint of the previous section. This is key to preventing roller marks.
- Apply Two Thin Coats: Resist the urge to apply one thick coat. Two thin, even coats provide better coverage, a smoother finish, and significantly reduce the risk of drips and sags. Allow the first coat to dry completely according to paint manufacturer instructions before applying the second.
- Avoid Over-Rolling: Once paint is applied, avoid rolling over it repeatedly as it starts to dry. This can create texture, lift previous layers, or leave marks.
- Good Lighting: Use a strong work light or natural light to check your progress as you paint, looking for missed spots or unevenness.
Tips for smooth coverage
Beyond technique, these extra tips ensure your ceiling looks flawless.
- Choose Flat Ceiling Paint: This finish is designed to hide minor imperfections and provides a uniform, non-reflective surface that diffuses light beautifully.
- Use an Extension Pole: Not only for safety, but an extension pole allows you to apply more consistent pressure and reach all areas comfortably, leading to a smoother, more even finish.
- Proper Roller Nap: As mentioned, a thicker nap holds more paint and is crucial for getting paint into all the ceiling textures (even if seemingly smooth, ceilings often have a slight texture).
- Ventilation: Ensure good airflow by opening windows or using fans. This helps paint dry properly and reduces fumes.
- Remove Tape When Paint is Wet: For the cleanest lines, carefully pull off painter’s tape while the paint is still slightly wet. If you wait until it’s fully dry, the paint might crack and peel along with the tape. If it’s already dry, score the tape edge lightly with a utility knife before pulling to prevent paint tearing.
- Cleanliness: Keep your roller and brushes clean throughout the process. If taking a break, wrap them tightly in plastic wrap or place them in a sealed plastic bag to prevent drying.
- Patience: Painting a ceiling can be tiring. Take breaks, and don’t rush the process. Rushing often leads to drips, missed spots, and a less professional finish.
By following these guidelines, you can confidently repaint your ceiling, transforming a dull overhead space into a bright, clean, and refreshing element of any room in your home.
Check it out: Ceiling paint vs. Wall paint: What’s the difference?
Is the thought of repainting your ceiling a high-reaching challenge? Anderson’s Painting specializes in expert interior painting, including meticulous ceiling preparation, stain covering, and flawless application for a smooth, refreshed finish. Let our experienced team handle the overhead work, so you can enjoy a brighter, more beautiful room. Contact us today for a free consultation!