
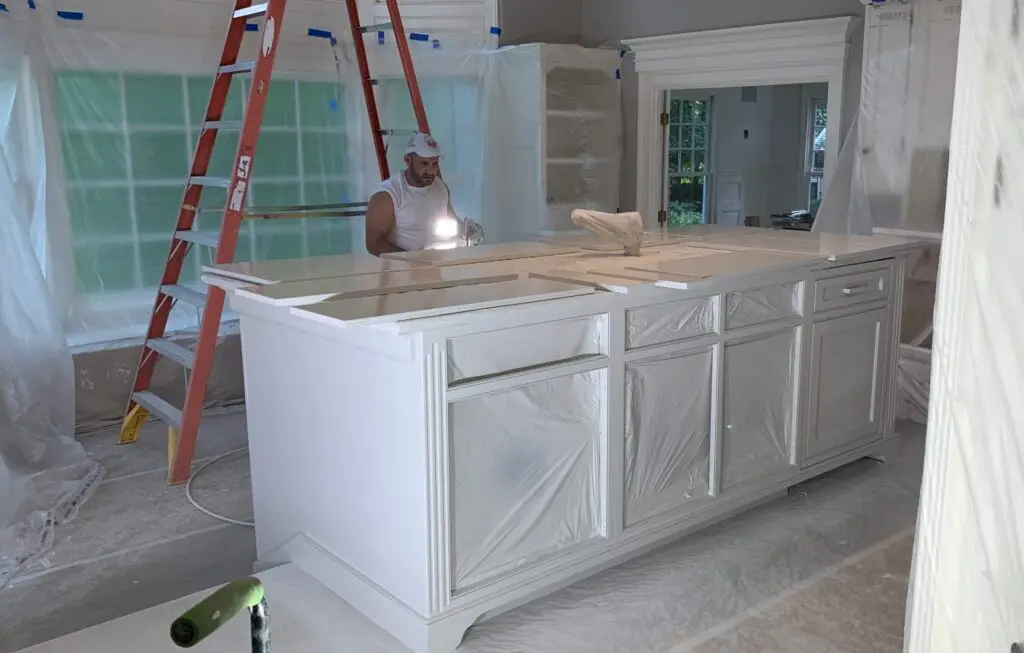
Spray painting is the technique of choice for achieving a truly high-end, factory-smooth finish on cabinets. Unlike brushing or rolling, which can leave texture or unevenness, spraying delivers a professional result that looks durable and flawless. However, it requires significant preparation, the right equipment, and meticulous control over the environment.
Why Spray Painting Cabinets Is a Popular Choice
For a cabinetry refresh, the investment in a sprayer and setup is often worth the superior aesthetic outcome.
Smooth, Factory-Like Finish
The primary benefit of spraying is the ability to apply paint in fine, atomized particles. When correctly thinned and sprayed, the paint lands softly on the surface and naturally levels out as it dries, eliminating visible brush strokes, roller stipple (orange peel texture), and other application marks. This results in the smooth, glass-like finish often found on newly manufactured cabinetry.
Faster Application
While the setup time (taping, masking, preparing the spray booth) is extensive, the actual time spent applying the paint is drastically reduced. Once the sprayer is tuned and the doors are laid out, coats can be applied quickly and efficiently. This speed is especially critical when working with fast-drying, solvent-based or hybrid enamel paints, which must be applied quickly to maintain a wet edge and achieve proper self-leveling.
Tools & Materials Needed
The quality of your tools directly impacts the quality of your finish. Do not use cheap, aerosol-can spray handles for cabinets.
HVLP Sprayer
A High Volume, Low Pressure (HVLP) sprayer is generally recommended for cabinets and fine finishing work.
- HVLP Benefits: It delivers a large volume of paint at a lower pressure, maximizing transfer efficiency (less waste/overspray) and allowing for better control over the finish, which is essential for delicate areas like cabinet edges and profiles.
- Alternative (Airless): A fine-finish airless sprayer can also be used, but it must be fitted with a smaller tip (like a 310 or 410) and the pressure must be kept as low as possible to atomize the material effectively without excessive rebound or overspray.
Paint Filters, Drop Cloths, Tack Cloths
- Paint Filters/Strainers: Mandatory for cabinet spraying. Even premium paints contain tiny particles or dried flakes. Running the paint through a fine-mesh filter before pouring it into the sprayer cup prevents clogs and ensures a perfectly smooth application.
- Drop Cloths and Plastic Sheeting: Use both cloth drop cloths (to manage floor spills) and lightweight plastic sheeting to mask walls, ceilings, and large items completely.
- Tack Cloths: These are essential for the final dust removal step. They have a sticky resin that picks up fine sanding dust and lint that vacuuming and wiping can miss.
Cabinet-Grade Paints
The ideal cabinet paint is a self-leveling, durable enamel.
- Hybrid Alkyd-Urethane Enamel: These are professional-grade paints that combine the durability, hardness, and leveling properties of oil-based paints with the easy cleanup and lower VOCs of water-based products. Look for premium lines like Benjamin Moore Advance or Sherwin-Williams Emerald Urethane Trim Enamel.
- Sheen: A satin or semi-gloss finish is highly recommended for cabinets, as the slight sheen aids in durability, moisture resistance, and cleaning.
Prep Steps Before Spraying
Preparation is exponentially more important when spraying, as the fine mist highlights every imperfection, speck of dust, and uneven spot on the surface.
Removing Doors and Hardware
- Dismantle and Label: Completely remove all doors, drawer fronts, and hardware (hinges, knobs, handles). Use a numbering system (e.g., painters tape inside the frame and on the back of the door) to ensure every piece returns to its exact original location.
- Clean and Degrease: Wash all surfaces (boxes and doors) thoroughly with a powerful degreaser, such as a TSP substitute, to remove all grease, wax, and cooking film. Rinse and dry completely.
Cleaning, Sanding, and Priming
- Sanding: Lightly sand the entire surface (including frames) with 180-220 grit sandpaper to dull the finish and create a strong mechanical bond for the primer.
- Dust Removal: Vacuum up large debris, then wipe down all surfaces repeatedly with a tack cloth until they are completely free of dust.
- Priming: A high-quality adhesion primer is non-negotiable, especially when painting over old finishes or wood with open grain (e.g., oak). The primer must be sanded lightly (320 grit) after drying to create a perfectly smooth base layer.
Creating a Controlled Spray Area
Spraying generates atomized paint particles that can travel far. A controlled environment is mandatory for both quality and safety.
- Ventilation: Use high-power box fans placed in a window or door to exhaust air outside. Ensure fresh air is drawn in from an opposite location. Wear a respirator with organic vapor cartridges.
- Masking: Mask everything you do not want painted—walls, ceilings, windows, countertops—using plastic sheeting and painter’s tape. Seal all edges completely.
- Hanging/Staging: For doors, either hang them vertically (using screws in the hinge holes and wire) or lay them horizontally on sawhorses with supports (using painter’s pyramids or temporary screws in the back). Vertical spraying helps reduce dust settling; horizontal spraying aids in self-leveling.
How to Spray Paint Cabinets: Step-by-Step
Adjusting Sprayer Settings
Proper tuning ensures the paint atomizes correctly and lays down smoothly.
- Thinning: Always check the paint’s technical data sheet. If needed, thin the paint with the manufacturer’s recommended solvent (water for acrylics, mineral spirits for oil-based) to the correct viscosity to allow for smooth spraying.
- Practice: Test the spray pattern on a piece of cardboard or scrap wood. Adjust the fluid control knob until the pattern is a consistent, smooth oval without heavy edges (“tails”).
- Pressure: Set the pressure on an HVLP unit to the lower end of the recommended range for your paint type to minimize bounce-back and overspray.
Applying Thin, Even Coats
The goal is to apply multiple thin, wet layers, not one thick coat.
- Distance: Hold the sprayer tip consistently 8 to 12 inches from the surface.
- Motion: Move your arm in a straight, parallel motion across the piece. Do not “arc” your wrist, as this will result in a thicker coat in the center and thin coats on the edges.
- Overlap: Overlap each pass by approximately 50% to ensure uniform coverage.
Preventing Drips and Overspray
- Feather the Edges: When spraying the edge of a door, move the gun past the edge before releasing the trigger. Start moving the gun before pulling the trigger. This ensures no build-up occurs at the start or end of the pass.
- Monitor Wet Edge: Watch the paint as it goes down. It should look wet and glossy, but not so thick that it is starting to run or sag. If you see a sag, stop immediately, let it tack up slightly, and lightly sand it smooth before re-spraying.
- Wait for Flash: Allow each coat to “flash” (the initial surface drying where the solvent evaporates) before applying the next coat, following the specific timings on the paint can.
FAQs About Spray-Painting Cabinets
“Do cabinets need primer before spraying?”
Yes, absolutely. Primer serves three critical purposes:
- Adhesion: It bonds to the substrate (especially laminate, MDF, or glossy finishes) where the topcoat cannot.
- Sealing: It seals tannins or wood grain, preventing them from bleeding through the final paint color.
- Base Layer: It ensures uniform porosity and color, allowing the topcoat to dry evenly and consistently.
“Can I spray paint cabinets indoors?”
You can, but it is dangerous and ill-advised without heavy-duty, professional-level ventilation and masking. The fine mist of overspray will travel through your entire HVAC system, settle on floors, walls, and furniture, and pose a major health hazard from inhaling paint fumes and particles. It is best practice to move doors and drawers to a dedicated garage or portable tent setup for spraying and to prime/paint the cabinet boxes in place with extreme masking.
“How long does the finish last?”
A finish applied with the proper prep (sanding, bonding primer) and a durable cabinet enamel (hybrid alkyd) will last 10 to 15 years before showing significant wear. The most important factor in long-term durability is the cure time—treating the finished cabinets gently for the first 30 days while the paint hardens to maximum resistance.
Achieving a flawless, sprayed finish is a skill that delivers unparalleled results. It’s the difference between a DIY project and a professional cabinet upgrade.
Ready for a factory-smooth kitchen makeover? Anderson’s Painting specializes in fine-finish spray application for cabinets. Contact us today for a consultation!