
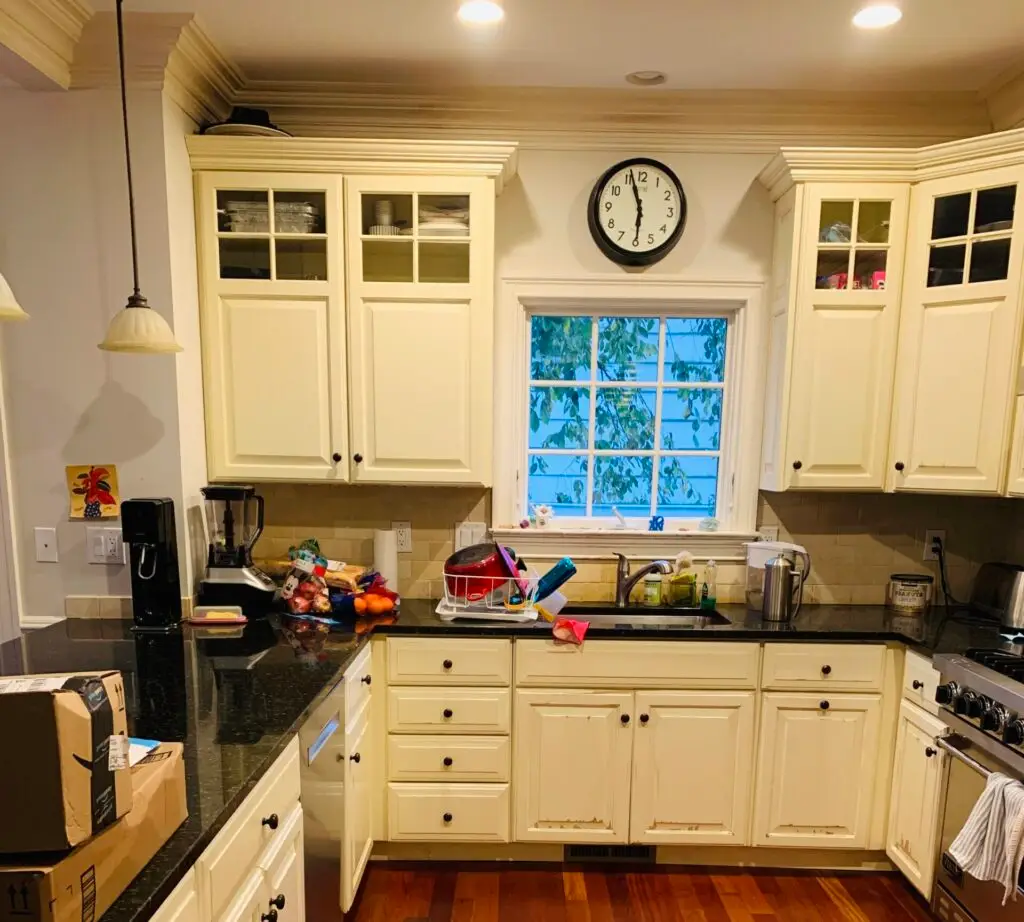
Painting kitchen cabinets is one of the most impactful and budget-friendly ways to transform your kitchen’s aesthetic without the expense and disruption of a full remodel. A fresh coat of paint can instantly brighten the space, update a dated look, and add significant value to your home. However, kitchen cabinets endure daily wear and tear, grease, and moisture, demanding a durable and professional finish. This DIY guide from Anderson’s Painting will walk you through the entire process, from deciding whether to paint or replace, to preparation, painting techniques, and post-painting care, ensuring a beautiful and long-lasting result.
Should you paint or replace cabinets?
Before diving into a painting project, it’s essential to assess whether painting is the right solution for your cabinets.
Consider Painting if:
- Good Condition Structurally: Your cabinet boxes, doors, and drawer fronts are sturdy, well-constructed, and don’t have major structural damage (e.g., severe warping, rot, crumbling particle board).
- Functional Hardware: Hinges, drawer slides, and interior shelving are all in good working order.
- Desire for Aesthetic Update: You simply want to change the color or style of your kitchen, rather than a complete layout change.
- Budget Constraints: Painting is significantly more affordable than replacing cabinets.
- Temporary Solution: For a quick refresh before selling your home or while saving up for a full renovation.
Consider Replacing if:
- Severe Damage: Cabinets are structurally unsound, have extensive water damage, mold, or irreparable warping/rotting.
- Poor Functionality: Drawers constantly stick, hinges are broken beyond repair, or the interior storage doesn’t meet your needs.
- Inefficient Layout: You desire a completely new kitchen layout, more storage, or different cabinet configurations.
- Low-Quality Materials: If your cabinets are made from very cheap, thin particle board or thermofoil that is peeling extensively, paint might not adhere well or last long.
- High-End Finish Desired: While DIY painting can look good, a factory-applied finish on new cabinets is typically more durable and flawless than what can be achieved at home.
Tools and materials needed
Preparation is key, and having everything on hand prevents delays.
- Safety Gear:
- Rubber gloves
- Safety glasses
- N95 respirator mask (especially when sanding or using oil-based/epoxy paints)
- Disassembly & Protection:
- Screwdriver (manual or power drill with appropriate bits)
- Numbered labels and small plastic bags/containers (for hardware and door/drawer organization)
- Painter’s tape (high-quality, low-tack, 1-1.5 inches wide)
- Drop cloths or old sheets
- Work surface protection (cardboard, old towels)
- Cleaning:
- Degreaser cleaner (e.g., TSP substitute, Krud Kutter, or heavy-duty kitchen degreaser)
- Clean sponges and cloths
- Bucket of warm water
- Sanding & Preparation:
- Sanding blocks or orbital sander
- Sandpaper (120-grit for initial sanding, 220-grit for smoothing primer/between coats)
- Tack cloth or microfiber cloths (for dust removal)
- Wood filler or spackle (for imperfections)
- Putty knife
- Priming & Painting:
- High-quality bonding primer (e.g., Zinsser B-I-N Shellac-Based Primer, Kilz Adhesion, or a water-based bonding primer)
- Paint specifically formulated for cabinets or trim (e.g., acrylic-urethane enamel, water-based alkyd, or specialized cabinet paint)
- Paint tray
- High-quality synthetic bristle brush (e.g., angled sash brush for cutting in, corners, and detailed areas)
- Small foam roller or fine-finish mohair roller (4-6 inches for smooth surfaces)
- Roller covers (appropriate nap for your roller type, usually 1/4″ or 3/8″ nap for smooth results)
- Paint stirrer
- Optional:
- Painter’s pyramids or small blocks (to elevate doors/drawers for drying)
- Paintable caulk (for filling small gaps in cabinet frames)
How to prep cabinets for paint
This is the most critical stage. Proper preparation is 80% of a lasting, beautiful paint job.
- Empty and Disassemble:
- Remove all contents from inside the cabinets and drawers.
- Carefully remove all doors and drawer fronts. Use numbered labels and note their original position (e.g., “U1-L” for Upper Cabinet 1, Left Door). Place all hinges, pulls, and knobs in clearly labeled plastic bags for each door/drawer. This ensures easy reassembly.
- Remove shelves from inside the cabinet boxes.
- Clean Thoroughly:
- Kitchen cabinets accumulate grease, food splatter, and grime. This must be completely removed.
- Mix your degreaser cleaner according to instructions. Using clean sponges and cloths, thoroughly scrub all surfaces: cabinet boxes (inside and out, visible areas), door and drawer fronts (front and back).
- Rinse meticulously with clean water and a clean cloth to remove all cleaner residue. Allow to dry completely. Any lingering grease or residue will prevent paint adhesion.
- Repair Imperfections:
- Inspect all surfaces for dents, dings, scratches, or small holes.
- Fill these imperfections with wood filler or spackle using a putty knife.
- Allow the filler to dry completely as per manufacturer instructions.
- Sand All Surfaces:
- Purpose: Sanding creates a “tooth” for the primer to grip onto, which is essential for proper adhesion and a durable finish, especially over existing finishes.
- Grit: Start with 120-grit sandpaper if the cabinets have a thick, glossy finish or deep imperfections. For lighter scuff-sanding, or after filling repairs, use 220-grit.
- Method: Sand all surfaces (doors, drawer fronts, and cabinet frames) evenly. You don’t need to remove all existing finish, just dull the sheen and create a consistent, slightly rough texture. Sand with the grain of the wood if applicable.
- Edge Sanding: Pay attention to edges and corners.
- Remove Dust (Crucial!):
- After sanding, use a vacuum with a brush attachment to remove loose dust.
- Follow with a thorough wipe-down using a tack cloth or a damp microfiber cloth to pick up all fine dust particles.
- Allow surfaces to dry completely after wiping. Dust left behind will create bumps and prevent adhesion.
- Mask Off:
- Use high-quality painter’s tape to protect adjacent walls, countertops, and appliances. Press firmly to create a tight seal.
Priming and painting techniques
Choosing the right paint and applying it correctly is key to a smooth, durable finish.
1. Priming
- Why Prime? Primer is non-negotiable for kitchen cabinets. It promotes adhesion on slick surfaces, blocks stains (especially if going from dark wood to light paint), hides imperfections, and provides a uniform base for the paint.
- Type of Primer: Use a high-quality bonding primer.
- Shellac-based primer (e.g., Zinsser B-I-N): Excellent for blocking stains (like from old wood or smoke), powerful adhesion over slick surfaces, and fast-drying. Has strong fumes.
- Water-based bonding primer (e.g., Kilz Adhesion, Zinsser Bulls Eye 1-2-3 Plus): Easier cleanup, lower odor, good adhesion for most surfaces.
- Oil-based primer (e.g., Kilz Original): Excellent stain-blocking and adhesion, but slower drying and stronger fumes.
- Application:
- Stir primer thoroughly.
- Use a high-quality brush for corners, recessed panels, and detailed areas.
- Use a small foam roller for flat surfaces of doors, drawer fronts, and cabinet frames. Roll in long, even strokes.
- Apply thin, even coats. Avoid thick applications, which can lead to drips and slow drying.
- Light Sanding (Optional but Recommended): Once the first coat of primer is completely dry (check manufacturer’s recoat time), lightly sand with 220-grit sandpaper to smooth out any brush strokes or imperfections. Remove dust with a tack cloth. A second coat of primer might be beneficial for very dark or challenging surfaces.
2. Painting
- Paint Type: For kitchen cabinets, choose a paint that offers exceptional durability, hardness, and washability.
- Acrylic-Urethane Enamel (Water-Based Hybrid): This is often considered the best choice. It combines the easy cleanup of water-based paints with the hard, durable finish of oil-based paints (e.g., Sherwin-Williams Emerald Urethane Trim Enamel, Benjamin Moore Advance).
- 100% Acrylic Latex Enamel (Premium Grade): High-quality acrylic latex paints designed for trim and cabinets offer good durability and washability.
- Finish (Sheen):
- Satin, Semi-Gloss, or Gloss: These are the best sheens for kitchen cabinets. They create a smooth, hard surface that is highly resistant to grease, moisture, and frequent cleaning.
- Satin: Soft sheen, very popular, easy to clean.
- Semi-Gloss: More noticeable shine, very durable, easiest to clean. Will show imperfections more.
- Gloss: Highest shine, extremely durable, but highlights every flaw.
- Satin, Semi-Gloss, or Gloss: These are the best sheens for kitchen cabinets. They create a smooth, hard surface that is highly resistant to grease, moisture, and frequent cleaning.
- Application Techniques:
- Work in a Clean, Dust-Free Area: Set up your painting station for doors and drawer fronts in a well-ventilated area away from dust and drafts. Elevate pieces on painter’s pyramids or small blocks.
- Brush First (for details): Use your angled sash brush to carefully paint any recessed panels, moldings, and edges on doors and drawer fronts. For cabinet frames, paint inside edges and corners first.
- Roll Flat Surfaces: Immediately after brushing, use your small foam roller on the flat surfaces. Roll over the brushed areas where possible to minimize brush marks and create a smooth finish. Roll in long, even strokes, maintaining a “wet edge.”
- Apply Thin Coats: Always apply two or three thin, even coats of paint. This is crucial for durability and a smooth finish. Thick coats are prone to drips, slow drying, and an uneven appearance.
- Paint Backs First (for doors/drawers): If painting both sides, paint the backs of doors and insides of drawer fronts first. Once dry to the touch, flip them over and paint the fronts.
- Avoid Overworking: Apply the paint and then leave it alone. Excessive brushing or rolling can create texture and marks.
Drying time and reassembly
Patience during drying and curing is essential for a long-lasting finish.
- Drying Between Coats:
- Allow each coat of paint to dry completely according to the manufacturer’s instructions. This usually ranges from 4-8 hours for water-based enamels, and longer for hybrids.
- Light Sanding: Lightly sand (220-grit) between coats if there are any imperfections or for enhanced adhesion. Remove all dust with a tack cloth before the next coat.
- Full Drying Time (Before Handling/Reassembly):
- Even if the paint feels dry to the touch, it needs more time to harden fully. Wait at least 24-48 hours (or longer, per manufacturer guidelines) after the final coat before attempting to reattach hardware or move the pieces for reassembly. Premature handling can lead to chips, scratches, and fingerprints.
- Curing Time (Before Heavy Use):
- Paint “cures” over a longer period, sometimes 3-4 weeks for full hardness. During this time, the paint is still hardening.
- Be Gentle: Avoid heavy scrubbing, abrasive cleaners, or placing wet items directly on the painted surfaces during the curing period. Use drawer and door pulls carefully.
- Reassemble Carefully:
- Once fully dry and cured (or sufficiently hardened to avoid damage), reattach all hardware using your labeled bags.
- Re-hang doors and re-insert drawers into their labeled positions. Adjust hinges as needed for proper alignment.
Maintenance and care tips
Proper care will keep your newly painted cabinets looking great for years.
- Gentle Cleaning: Clean painted cabinets with a mild dish soap and warm water, using a soft cloth or sponge. Avoid abrasive cleaners, scrubbing pads, or harsh chemicals (like bleach or ammonia), which can dull or damage the paint finish.
- Wipe Spills Immediately: Quickly wipe away food splatters, grease, or water to prevent stains and paint damage.
- Protect from Heat and Moisture: Use exhaust fans when cooking. Avoid placing hot appliances directly against painted surfaces without protection.
- Touch-Up Paint: Keep a small amount of your cabinet paint for easy touch-ups of minor dings or scratches that may occur over time.
By following this detailed guide, you can successfully paint your kitchen cabinets, achieving a durable, beautiful finish that revitalizes your kitchen space and enhances your home’s appeal.
Dreaming of a fresh, updated kitchen without the high cost of a full remodel? Anderson’s Painting specializes in expert kitchen cabinet painting, delivering a flawless, durable finish that transforms your space. While this guide offers comprehensive DIY steps, for a truly professional result that withstands daily kitchen demands, trust our experienced team. Contact us today for a free consultation and estimate!